|
Flash Video Lossless Joiner — How it works
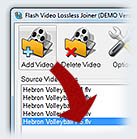
1. Add your video clips into a list
Click the «Add Video» button. Standard File
Open dialogue appears, where you can choose one or more Flash Video (FLV) files.
Files are sorted by name when they're added into the Joiner list, so it's very
suitable to name source files like "Video Part 1.flv", "Video Part 2.flv", etc.
|
 |
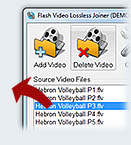
2. How to remove a video clip from list
Select a video list item and click the «Delete
Video» button to remove a video file from the joining list. Please note,
that this action doesn't delete the source video file itself from its location.
|

3. How to join a part of video clip with other video clips
FLV Lossless Joiner has Lossless Trimmer tool, which allows
to include only a part of source video clip into the final movie. You might wish
to cut-off one or more segments of the source video clip and include these
segments into the final movie. It's easy to do that. Just include the same source
video file into the Joiner list as many times as many segments you need to include.
Then select each list item and click «Options» button. Lossless Trimmer
dialogue appears, where you have the next controls:
- Start position slider - roughly adjusts the initial trimming position.
Initial position can be set only to a video keyframe, if FLV file contains a
video track, or to any audio frame, if it's the audio-only file.
- End position slider - roughly adjusts the final trimming position.
This position can be set to any video or audio frame of the FLV file.
- Initial position indicator - indicates the initial trimming position
in hours/minutes/seconds/milliseconds format.
- Initial position fine adjustment buttons - allow to set the initial
trimming position to any possible value. Each button click moves position by
one frame (next video keyframe for videotracks). Pressing the button and
holding it in the pressed state for one second initiates fast position change,
i.e. it's usual autorepeat effect.
- Final position indicator - indicates the final trimming position
in hours/minutes/seconds/milliseconds format.
- Final position fine adjustment buttons - allow to set the final
trimming position to any possible value. Each button click moves position by
one frame. Pressing the button and holding it in the pressed state for one
second initiates fast position change, i.e. it's usual autorepeat effect.
- Trimmed duration indicator - indicates trimmed duration value, i.e.
the difference between final and initial positions.
- Preview button - opens a preview of the trimmed movie.
- Frame type indicators - small colored rounds, located above the
upper right corner of position indicators, indicate video/audio frame types.
Green color means video frame, blue color means audio frame and red color
means video key frame.
|
